Creating a healthy saltwater aquarium starts with understanding how to properly mix and use aquarium salt. Many beginners struggle with cloudy water, unstable parameters, and stressed fish simply because they haven’t mastered this fundamental skill. Getting your salt mix right makes the difference between a thriving underwater ecosystem and constant water quality problems.
The good news is that mixing aquarium salt correctly isn’t complicated once you understand the basic principles. With the right equipment, proper technique, and attention to detail, you can consistently achieve crystal clear water that supports vibrant marine life. This guide will teach you everything you need to know about using salt mix effectively in your home aquarium.
Whether you’re setting up your first saltwater tank or trying to improve water clarity in an existing system, mastering salt mixing techniques is essential. Let’s explore how to choose the right salt, mix it properly, and maintain the pristine water conditions your marine inhabitants deserve.
Understanding Aquarium Salt Mix Basics
Aquarium salt mix is a carefully formulated blend of minerals and trace elements that recreates natural seawater. Unlike table salt, which is simply sodium chloride, quality salt mixes contain dozens of compounds necessary for marine life to thrive. These include calcium, magnesium, potassium, and various trace elements.
Different manufacturers produce salt mixes with varying formulations. Some are designed for fish-only systems, while others cater to reef aquariums with demanding corals. Understanding these differences helps you choose the appropriate product for your specific needs.
The quality of your salt mix directly affects water clarity and livestock health. Premium brands dissolve completely without leaving residue or causing cloudiness. They also maintain consistent formulations batch after batch, ensuring stable water parameters. Cheaper alternatives may save money initially but often create problems that cost more to fix later.
Additionally, salt mixes have shelf lives that affect their performance. Exposure to moisture or air causes clumping and chemical changes that reduce effectiveness. Proper storage in sealed containers away from humidity preserves your salt’s quality and mixing performance.
Choosing the Right Salt Mix for Your Tank
Selecting the appropriate salt mix depends on what you plan to keep in your aquarium. Different inhabitants have different requirements, and your salt choice should match those needs.
Fish-only systems can use basic salt mixes that provide essential minerals without elevated calcium and alkalinity levels. These formulations are typically more affordable and work perfectly well for hardy fish species. They dissolve easily and create stable salinity without unnecessary additives.
Reef aquariums require enhanced salt mixes with elevated calcium, alkalinity, and magnesium. Corals constantly consume these elements as they grow, so starting with higher levels helps maintain stability. Reef salt mixes also include additional trace elements that support coral coloration and health.
Consider your local water quality when choosing salt. If your tap water contains high levels of certain minerals, you might need a different formulation than someone using reverse osmosis water. Some manufacturers offer specialized blends for various water sources.
Research brand reputation before purchasing. Established manufacturers with good track records produce consistent products that won’t surprise you with batch-to-batch variations. Online forums and local aquarium clubs provide valuable insights into which brands perform reliably.
Essential Equipment for Mixing Salt
Having the right tools makes salt mixing easier and more accurate. Investing in proper equipment upfront prevents frustration and ensures better results during your DIY aquarium setup.
A dedicated mixing container is essential. Food-grade plastic buckets or Brute trash cans work well, depending on how much water you need to prepare. Never use containers that previously held chemicals or cleaning products, as residue can contaminate your aquarium water.
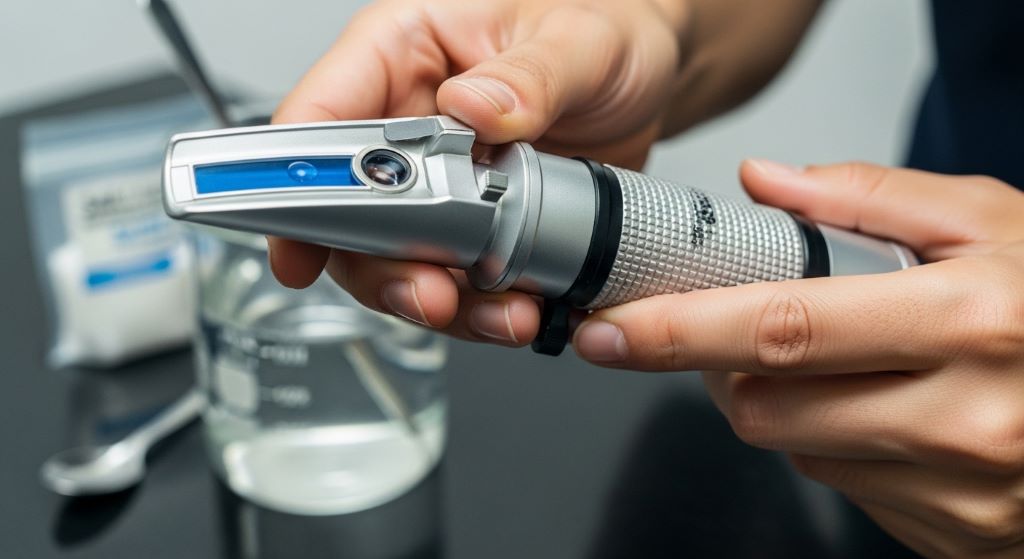
A reliable refractometer or hydrometer measures salinity accurately. Refractometers provide more precise readings than swing-arm hydrometers and compensate for temperature variations. Calibrate your refractometer regularly with calibration solution to ensure accurate measurements.
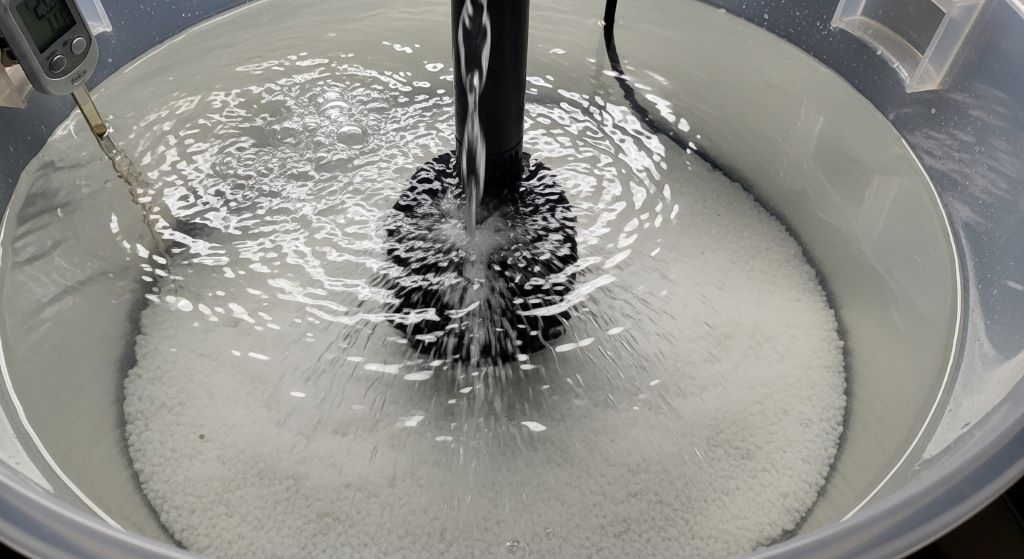
Powerheads or pumps circulate water during mixing, helping salt dissolve completely. Adequate circulation prevents undissolved salt from settling at the bottom and ensures even distribution of all components. Position the powerhead to create strong flow throughout the entire mixing container.
Additionally, a heater maintains proper temperature during mixing. Salt dissolves more completely in warm water, and matching your mixing water temperature to your aquarium temperature prevents shocking fish during water changes.
The Proper Mixing Process Step by Step
Following the correct mixing procedure ensures complete dissolution and optimal water clarity. Rushing this process or skipping steps leads to cloudy water and unstable parameters.
Start with clean, purified water. Reverse osmosis or deionization systems remove contaminants that cloud water or introduce unwanted substances. If using tap water, treat it with a quality dechlorinator first. Fill your mixing container with the desired amount of water before adding salt.
Add salt gradually while the powerhead circulates water. Dumping all the salt at once creates dense pockets that dissolve slowly. Adding it slowly allows better distribution and faster dissolution. Follow the manufacturer’s instructions for the salt-to-water ratio, which typically ranges from half a cup to three-quarters cup per gallon.
Allow the mixture to circulate for at least one hour, though overnight mixing is better. This extended mixing time ensures complete dissolution of all components and allows the water chemistry to stabilize. Some minerals take longer to fully dissolve than others.
Test salinity after mixing is complete. Target specific gravity should be between 1.025 and 1.026 for most marine aquariums. If salinity is too low, add more salt. If too high, add more purified water. Always retest after making adjustments.
Achieving and Maintaining Crystal Clear Water
Cloudy water after mixing salt usually indicates incomplete dissolution or contamination. Understanding the causes helps you prevent and correct clarity issues.
Temperature significantly affects dissolution rates. Cold water slows the dissolving process and may cause some minerals to precipitate out temporarily. Heating your mixing water to 75-80 degrees Fahrenheit speeds dissolution and prevents cloudiness.
Inadequate circulation leaves undissolved particles suspended in the water. Ensure your powerhead creates enough flow to reach all areas of your mixing container. Dead spots allow salt to settle rather than dissolve.
Old or improperly stored salt can cause persistent cloudiness. Moisture exposure causes chemical reactions that create insoluble compounds. If your salt has hardened into clumps or changed color, it may no longer mix clearly. Fresh salt from sealed containers produces the clearest results.
Furthermore, contaminants in your source water contribute to cloudiness. Even with salt that mixes perfectly clear, poor source water quality creates turbid results. Investing in a good reverse osmosis system pays dividends in water clarity tips implementation.
Common Mixing Mistakes to Avoid
Many aquarists unknowingly sabotage their mixing efforts through easily avoidable errors. Learning from these common mistakes saves time and frustration.
Adding salt to an empty container before water creates concentrated areas that won’t dissolve properly. Always add water first, then salt. This sequence ensures even distribution from the start.
Using hot water from the tap introduces dissolved metals and other contaminants. While hot water speeds dissolution, it often contains copper and other substances leached from pipes. Heat cold, purified water instead.
Skipping the equilibration period leads to inaccurate salinity readings and unstable chemistry. Freshly mixed saltwater needs time for all chemical reactions to complete. Testing immediately after mixing doesn’t reflect the final parameters.
Reusing old saltwater from water changes seems economical but introduces dissolved organics and depleted trace elements. Always use fresh salt mix for water changes to maintain optimal water quality.
Monitoring and Adjusting Salinity
Maintaining stable salinity is crucial for fish and invertebrate health. Small fluctuations stress marine life, while large swings can be fatal.
Test salinity regularly, at least weekly, to catch drift before it becomes problematic. Evaporation removes pure water, leaving salt behind and raising salinity. Topping off with fresh water compensates for evaporation and maintains stable salinity.
Temperature affects salinity readings with most testing methods. Refractometers with automatic temperature compensation provide accurate readings regardless of water temperature. Without ATC, you must adjust readings based on temperature charts provided by the manufacturer.
When adjusting salinity, make changes gradually. Adding large amounts of fresh water or salt solution at once stresses livestock. Spread adjustments across several days, making small corrections each time.
Additionally, track your evaporation rate to anticipate top-off needs. Knowing how much water evaporates daily helps you maintain stable salinity through consistent top-offs rather than reactive corrections.
Water Changes and Salt Mix Usage
Regular water changes are fundamental to maintaining crystal clear water and healthy livestock. Proper technique maximizes the benefits while minimizing stress.
Mix new saltwater at least 24 hours before use. This waiting period allows complete dissolution, chemical stabilization, and temperature equilibration. Rushing water changes with freshly mixed salt can shock fish and create temporary cloudiness.
Match temperature and salinity between new water and aquarium water. Significant differences stress fish and can trigger disease outbreaks. Test both before beginning the water change.
Remove water from your aquarium before adding new water. This prevents overflow and allows better control over water parameters. Use the removed water to clean equipment or rinse filter media.
Consider smaller, more frequent water changes rather than large, infrequent ones. This approach maintains more stable conditions and reduces the amount of salt you need to mix at one time. Many successful aquarists change 10-15 percent weekly rather than 25-30 percent monthly.
Troubleshooting Cloudy Water Issues
Despite following proper procedures, you may occasionally encounter cloudiness. Systematic troubleshooting identifies and resolves the problem.
White cloudiness usually indicates undissolved salt or precipitation of minerals. Increased circulation and time often resolve this issue. If cloudiness persists beyond 24 hours, your salt may be old or contaminated.
Brown or yellow tints suggest contamination from your mixing container or source water. Clean containers thoroughly between uses. Test your source water for iron and other contaminants that discolor mixed saltwater.
Milky appearance that doesn’t settle might indicate bacterial bloom. While alarming, bacterial blooms typically resolve on their own within a few days as the bacterial population stabilizes. Ensure adequate circulation and avoid overfeeding.
Green water signals algae growth in your mixing container. Store mixed saltwater in darkness and use it promptly. Clean containers thoroughly if algae appears, and avoid preparing saltwater too far in advance.
Storage and Preparation Tips
Proper storage of both dry salt and mixed saltwater ensures consistent quality and prevents contamination. Good habits in these areas support long-term success.
Keep dry salt in its original container or transfer it to airtight buckets. Moisture is salt’s biggest enemy during storage. Seal containers tightly after each use and store them in low-humidity areas.
Mix saltwater in containers dedicated solely to aquarium use. Cross-contamination from other uses introduces substances harmful to marine life. Label containers clearly to prevent accidental misuse.
Prepare water changes in advance during your DIY aquarium setup routine. Having mixed saltwater ready eliminates the temptation to rush the process during busy weeks. Store prepared water in sealed containers to prevent evaporation and contamination.
However, don’t store mixed saltwater indefinitely. Use prepared water within one week to maintain optimal quality. Extended storage allows precipitation of minerals and provides time for bacterial growth.
Conclusion
Using aquarium salt mix correctly is foundational to maintaining crystal clear water and healthy marine life. The process involves choosing quality salt appropriate for your livestock, using proper equipment, and following careful mixing procedures. Taking time to dissolve salt completely in purified water heated to appropriate temperatures prevents cloudiness and ensures stable parameters.
Avoiding common mistakes like adding salt before water, using contaminated source water, or rushing the mixing process saves you from frustration and water quality problems. Regular monitoring and gradual adjustments maintain the stable salinity your marine inhabitants need.
Remember that water clarity tips extend beyond just mixing salt properly. Consistent water changes with well-prepared saltwater, proper equipment maintenance, and attention to detail all contribute to pristine aquarium conditions. The effort you invest in mastering salt mixing techniques pays dividends through healthier livestock and a more beautiful display.
By following these guidelines and developing good habits around salt mixing and water preparation, you’ll enjoy crystal clear water that showcases your marine ecosystem beautifully while providing optimal conditions for your fish and invertebrates to thrive.
Frequently Asked Questions
Can I use table salt instead of aquarium salt mix?
No, table salt lacks the essential minerals and trace elements marine life requires. Table salt is pure sodium chloride, while aquarium salt mix contains calcium, magnesium, potassium, and dozens of other compounds found in natural seawater. Using table salt will harm or kill your marine inhabitants. Always use salt mix specifically formulated for aquariums.
How long can I store mixed saltwater before using it?
Mixed saltwater should be used within one week for best results. Beyond this timeframe, minerals may precipitate out of solution, and bacterial growth can occur. Store mixed water in sealed containers away from light and use it as soon as practical. Freshly mixed water provides the most stable chemistry.
Why is my newly mixed saltwater cloudy?
Cloudiness usually results from incomplete dissolution, cold water temperature, or old salt mix. Increase circulation, warm the water to 75-80 degrees Fahrenheit, and allow more mixing time. If cloudiness persists beyond 24 hours, your salt may be contaminated or expired. Using fresh salt and purified water typically resolves the issue.
Do I need to age mixed saltwater before adding it to my tank?
Yes, allowing saltwater to mix for at least 24 hours ensures complete dissolution and chemical stabilization. This aging period allows pH to stabilize, minerals to fully dissolve, and temperature to equilibrate. Using freshly mixed salt can create temporary cloudiness and parameter fluctuations that stress livestock.
How much salt mix do I need for a water change?
Calculate based on your tank volume and water change percentage. Most salt mixes require approximately half to three-quarters cup per gallon, but follow manufacturer instructions. For a 50-gallon tank with a 20 percent water change, you’ll need to mix 10 gallons, requiring roughly 5-7.5 cups of salt mix.
Related Topics: