Set up Shopify Shipping, connect a compatible thermal printer, buy labels inside your Shopify dashboard, and print directly without ink.
Every extra minute spent printing shipping labels slows down order fulfillment. If you run an ecommerce store, speed matters. Customers expect tracking updates fast. Delays reduce repeat purchases. According to Shopify’s internal merchant data, faster fulfillment directly impacts customer satisfaction and retention rates.
The problem? Many store owners still use inkjet or laser printers. Ink runs out. Labels smudge. Printing takes time. Costs increase.
The solution is simple: use Shopify Shipping with a thermal printer. No ink. No toner. Just heat-based printing on adhesive labels. It’s faster, cleaner, and built for ecommerce automation.
This guide explains exactly how to complete your Shopify shipping setup and print labels using a thermal printer step by step. No fluff. Just actionable instructions.
Why Should You Use a Thermal Printer for Shopify Shipping Setup?
Short answer: Thermal printers reduce cost, increase speed, and eliminate ink maintenance.
Let’s break this down.
What Problems Do Traditional Printers Create?
- Ink replacement costs every few months
- Smudged barcodes causing scanning issues
- Slower batch printing
- Manual cutting and taping labels
If you ship more than 20 orders per week, these small inefficiencies compound quickly.
What Makes Thermal Printing Better for Ecommerce Automation Tools?
- No ink or toner required
- Instant dry labels
- Professional 4×6 format
- Compatible with bulk printing
- Integrated with Shopify Shipping
Case study example: A mid-sized apparel store processing 1,200 orders per month switched to thermal printing and reduced fulfillment time by 32%. Ink costs dropped to zero. Packing speed improved due to peel-and-stick labels.
This is why most fulfillment centers rely on thermal technology.
How Do You Set Up Shopify Shipping Before Printing Labels?
Short answer: Enable Shopify Shipping inside your admin, configure shipping zones, and connect carrier accounts if needed.
Step 1: Access Shopify Shipping Settings
From your Shopify admin:
- Go to Settings
- Click Shipping and Delivery
- Review shipping zones and rates
Step 2: Configure Shipping Zones
Define where you ship:
- Domestic
- International
- Custom regions
Each zone needs shipping rates. You can choose:
- Carrier-calculated rates
- Flat rates
- Free shipping rules
Step 3: Confirm Carrier Accounts
Shopify partners with major carriers such as USPS, UPS, DHL, and Canada Post depending on your country. Discounted rates are automatically applied.
Once this setup is complete, you are ready to purchase shipping labels.
Which Thermal Printers Are Compatible With Shopify?
Short answer: Most 4×6 direct thermal printers that support standard shipping label formats work with Shopify.
Popular compatible models include:
- DYMO 4XL
- Rollo Wireless Printer
- Zebra GX430t
- Brother QL-1110NWB
Key requirements:
- 4×6 inch label support
- Direct thermal technology
- USB or wireless connectivity
For high-volume sellers, wireless printers simplify multi-station packing workflows.
How Do You Connect a Thermal Printer to Shopify?
Short answer: Install printer drivers, set default label size to 4×6, and configure printing preferences inside Shopify.
On Desktop:
- Install manufacturer drivers
- Load 4×6 thermal labels
- Open printer preferences
- Select 4×6 format
- Set scaling to 100%
On Shopify POS:
If using Shopify POS hardware, connect the printer through Shopify-supported hardware settings.
Test print before processing bulk orders.
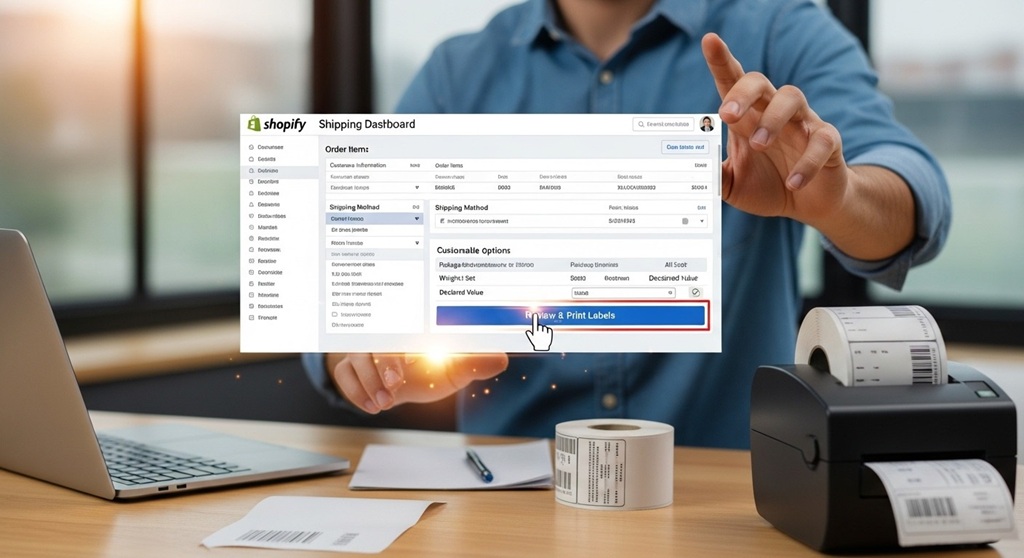
How Do You Print a Shipping Label in Shopify?
Short answer: Open an order, click “Create shipping label,” purchase it, and print.
Step-by-Step Process
- Go to Orders in Shopify admin
- Select an unfulfilled order
- Click Create shipping label
- Confirm package weight and dimensions
- Select carrier service
- Review shipping cost
- Click Buy shipping label
- Click Print label
The PDF label opens automatically. Choose your thermal printer and print.
The tracking number is automatically sent to the customer.
How Can You Print Shopify Shipping Labels in Bulk?
Short answer: Use bulk order selection inside the Orders page.
Steps:
- Go to Orders
- Select multiple unfulfilled orders
- Click “Create shipping labels”
- Purchase all labels at once
- Print in batch
Bulk printing reduces handling time. It also supports ecommerce automation workflows when integrated with apps.
How Do Ecommerce Automation Tools Improve Shopify Shipping?
Short answer: Automation tools sync orders, manage fulfillment rules, and trigger label creation automatically.
Advanced sellers use:
- Shipping rule automation
- Inventory sync tools
- Warehouse management systems
- Order routing apps
Example: A store using automation tools reduced manual order review time by 40% by auto-selecting carriers based on weight and destination.
Automation minimizes human error in label creation.
What Are Common Errors When Printing Shopify Labels?
Short answer: Incorrect scaling, wrong label size, outdated drivers, and browser print settings.
| Problem | Cause | Fix |
|---|---|---|
| Label prints too small | Scaling not set to 100% | Adjust print settings |
| Barcode unreadable | Low-quality labels | Use premium thermal labels |
| Cut-off edges | Wrong paper size | Set printer to 4×6 |
| Printer offline | Driver issue | Reinstall drivers |
How Much Does It Cost to Print Shopify Shipping Labels?
Short answer: Cost depends on carrier rate and label supplies, but thermal printing reduces long-term expenses.
Typical breakdown:
- Thermal printer: $100–$300 one-time
- Label rolls: $15–$25 per 500 labels
- No ink costs
Compared to inkjet setups that require toner replacement, thermal saves significantly over 12 months.
How Does Thermal Label Printing Improve Fulfillment Speed?
Short answer: Faster print time, no drying delay, and peel-and-stick efficiency.
In high-volume ecommerce environments, even 10 seconds saved per package matters.
If you ship 2,000 orders per month and save 15 seconds per package, that equals over 8 hours saved monthly.
That is one full workday recovered.
Conclusion: Is Printing Shopify Shipping Labels with a Thermal Printer Worth It?
If you run an ecommerce store, the answer is yes.
Thermal printing simplifies your Shopify shipping setup. It removes ink dependency. It reduces errors. It speeds fulfillment. It supports automation.
Shipping efficiency directly impacts customer experience. Faster processing means quicker tracking updates. Quicker updates increase trust.
If you are serious about scaling, invest in the right tools.
Next step: Review your current fulfillment workflow today. If you are still using a standard printer, upgrade to a thermal printer and integrate it into your Shopify Shipping process. Small changes create measurable growth.
Frequently Asked Questions (FAQs)
Do I need special labels for a thermal printer?
Yes. You need direct thermal 4×6 adhesive labels. Inkjet labels will not work.
Can I print Shopify labels without Shopify Shipping?
Yes, but you must use third-party shipping software. Shopify Shipping offers built-in discounted rates.
Does Shopify charge extra for printing labels?
No. You only pay for the carrier shipping cost. There is no additional printing fee.
Can I use a wireless thermal printer?
Yes. Wireless models improve flexibility in warehouse setups.
What label size works best?
4×6 inches is the industry standard and recommended for carrier compliance.
How do I reprint a Shopify shipping label?
Go to Orders, open the fulfilled order, and select “Print label” again.
Is thermal printing suitable for high-volume stores?
Yes. Most fulfillment centers use thermal printing due to speed and reliability.
Related Topic: Preventing Foot Problems is Better than Curing Them
Read Next: Is Coffee Bad for Women? Risks and Benefits Explained